
Chess Web Programming: Part Four: Chessboard Customisation
Customising the ChessboardI began my journey into modern web programming in October 2023, with Chessboard Magic as my first major project. Initially, it was just a simple exercise, but it quickly expanded, and now Chessboard Magic includes 34 unique chess-based applications! I’ve learned a lot along the way and want to share my experiences with you, hoping it encourages you to try building your own applications.
In case you missed them, here are the previous articles in this series:
- Part One: Getting Started – We set up our development environment and built a basic chessboard using React, react-chessboard, and chess.js. This setup allowed us to create a fully functional chessboard with move validation according to chess rules, providing a strong foundation for building interactive chess features.
- Part Two: Stockfish Integration – We integrated Stockfish, a powerful open-source chess engine, enabling our app to go beyond basic move validation. With Stockfish, we added functionality to calculate the best moves and provide position evaluations, making the chessboard a tool that could play against the user and analyze moves for tactical insights.
- Part Three: Deploying Your Application – We explored how to deploy our application using GitHub Pages, providing a free and accessible way to make our chess app available online. This section included setting up Git, creating a GitHub repository, and configuring deployment scripts, ensuring that all resource paths and assets load correctly in production.
In this fourth part, we’ll explore how to customize our chessboard—adding custom pieces, custom square colour, square highlighting, and coloured arrows—all building on the foundations from our first two posts.
Note: This blog is a continuation of part 1 and 2, so if you have not completed them, please do so and come back.
Adding Custom Pieces
Customizing chess pieces is a great way to add a unique look to your application. In this section, we’ll walk through setting up custom piece images, allowing you to personalize the visual style of your chessboard.
Step 1: Set Up the Pieces Folder
To get started, create a new folder in your project’s public directory to store your custom piece images. This folder will be where we add our custom pieces so they can be easily accessed by the chessboard component.
public/img/pieces
Step 2: Download the Minerva Piece Set
For this guide, we’ll use the Minerva Piece set—a custom-designed set that I created for another project. You can download the Minerva pieces from the following URL: Minerva Piece Set on GitHub.
Once downloaded, copy the images into the public/img/pieces folder you just created. Each file should be named according to the standard piece notation (e.g., wK.png for the white king, bQ.png for the black queen) to ensure the chessboard component can correctly recognize and render each piece.
Note: If you’re interested in exploring more chess piece styles, Lichess.org offers a repository of various piece designs. Feel free to explore and try different pieces to find a style that suits your application.
Step 3: Define Custom Pieces Logic
Now that the images are in place, we’ll define a customPieces variable that maps each piece to its respective image. Each piece key should correspond to a unique component displaying the correct image with the appropriate size. Using the squareWidth property ensures each piece will fit perfectly within its square.
Here’s how to set up the customPieces variable:
// Define the custom pieces logic
const customPieces = {
  wP: ({ squareWidth }) => (
    <img
      src="/img/pieces/wP.png"
      style={{ width: squareWidth, height: squareWidth }}
      alt="White Pawn"
    />
  ),
  wN: ({ squareWidth }) => (
    <img
      src="/img/pieces/wN.png"
      style={{ width: squareWidth, height: squareWidth }}
      alt="White Knight"
    />
  ),
  wB: ({ squareWidth }) => (
    <img
      src="/img/pieces/wB.png"
      style={{ width: squareWidth, height: squareWidth }}
      alt="White Bishop"
    />
  ),
  wR: ({ squareWidth }) => (
    <img
      src="/img/pieces/wR.png"
      style={{ width: squareWidth, height: squareWidth }}
      alt="White Rook"
    />
  ),
  wQ: ({ squareWidth }) => (
    <img
      src="/img/pieces/wQ.png"
      style={{ width: squareWidth, height: squareWidth }}
      alt="White Queen"
    />
  ),
  wK: ({ squareWidth }) => (
    <img
      src="/img/pieces/wK.png"
      style={{ width: squareWidth, height: squareWidth }}
      alt="White King"
    />
  ),
  bP: ({ squareWidth }) => (
    <img
      src="/img/pieces/bP.png"
      style={{ width: squareWidth, height: squareWidth }}
      alt="Black Pawn"
    />
  ),
  bN: ({ squareWidth }) => (
    <img
      src="/img/pieces/bN.png"
      style={{ width: squareWidth, height: squareWidth }}
      alt="Black Knight"
    />
  ),
  bB: ({ squareWidth }) => (
    <img
      src="/img/pieces/bB.png"
      style={{ width: squareWidth, height: squareWidth }}
      alt="Black Bishop"
    />
  ),
  bR: ({ squareWidth }) => (
    <img
      src="/img/pieces/bR.png"
      style={{ width: squareWidth, height: squareWidth }}
      alt="Black Rook"
    />
  ),
  bQ: ({ squareWidth }) => (
    <img
      src="/img/pieces/bQ.png"
      style={{ width: squareWidth, height: squareWidth }}
      alt="Black Queen"
    />
  ),
  bK: ({ squareWidth }) => (
    <img
      src="/img/pieces/bK.png"
      style={{ width: squareWidth, height: squareWidth }}
      alt="Black King"
    />
  ),
};
Pro Tip: You can take customization further by implementing multiple piece sets and allowing users to switch between them dynamically. For example, create additional folders within the
piecesdirectory for each piece set, then add a dropdown to select between these sets. I implemented this approach in Chessboard Magic, making it easy for users to change piece styles on the fly.
Step 4: Integrate Custom Pieces into the Chessboard
Finally, use the customPieces variable within the Chessboard component to apply these custom pieces:
<Chessboard
  position={game.fen()}
  onPieceDrop={onDrop}
  boardWidth={500}
  customPieces={customPieces}
/>
With this setup, your chessboard will display the custom Minerva pieces, adding a unique, personal touch to your application. This approach also makes it easy to adjust the pieces in the future—simply update the customPieces variable or replace the images in your folder.
Full Code
Here is the full code for integrating custom pieces, maintaining the Stockfish functionality and board interactions:
import React, { useState, useEffect } from "react"; // Import necessary React functions
import { Chessboard } from "react-chessboard"; // Import the chessboard component from react-chessboard
import { Chess } from "chess.js"; // Import the chess.js library for game logic

// Function to extract the best move and evaluation from Stockfish's output message
const getEvaluation = (message, turn) => {
  let result = { bestMove: "", evaluation: "" }; // Initialize result with empty values

  // If the message contains "bestmove", extract the best move
  if (message.startsWith("bestmove")) {
    result.bestMove = message.split(" ")[1]; // The best move is the second word in the message
  }

  // Check for "info score" in the message to extract the evaluation score
  if (message.includes("info") && message.includes("score")) {
    const scoreParts = message.split(" "); // Split message into words
    const scoreIndex = scoreParts.indexOf("score") + 2; // "cp" or "mate" is two words after "score"

    // If the score type is "cp" (centipawn), convert it to a pawn value
    if (scoreParts[scoreIndex - 1] === "cp") {
      let score = parseInt(scoreParts[scoreIndex], 10); // Parse the score value
      if (turn !== "b") {
        score = -score; // Invert the score if it's White's turn to match convention
      }
      result.evaluation = score / 100; // Convert centipawns to pawns (100 centipawns = 1 pawn)
    } else if (scoreParts[scoreIndex - 1] === "mate") {
      // If the score type is "mate", indicate how many moves until mate
      const mateIn = parseInt(scoreParts[scoreIndex], 10);
      result.evaluation = `Mate in ${Math.abs(mateIn)}`; // Absolute value for positive mate distance
    }
  }

  return result; // Return the result containing bestMove and evaluation
};

// Define custom pieces with each piece pointing to its image
const customPieces = {
  wP: ({ squareWidth }) => (
    <img
      src="/img/pieces/wP.png"
      style={{ width: squareWidth, height: squareWidth }}
      alt="White Pawn"
    />
  ),
  wN: ({ squareWidth }) => (
    <img
      src="/img/pieces/wN.png"
      style={{ width: squareWidth, height: squareWidth }}
      alt="White Knight"
    />
  ),
  wB: ({ squareWidth }) => (
    <img
      src="/img/pieces/wB.png"
      style={{ width: squareWidth, height: squareWidth }}
      alt="White Bishop"
    />
  ),
  wR: ({ squareWidth }) => (
    <img
      src="/img/pieces/wR.png"
      style={{ width: squareWidth, height: squareWidth }}
      alt="White Rook"
    />
  ),
  wQ: ({ squareWidth }) => (
    <img
      src="/img/pieces/wQ.png"
      style={{ width: squareWidth, height: squareWidth }}
      alt="White Queen"
    />
  ),
  wK: ({ squareWidth }) => (
    <img
      src="/img/pieces/wK.png"
      style={{ width: squareWidth, height: squareWidth }}
      alt="White King"
    />
  ),
  bP: ({ squareWidth }) => (
    <img
      src="/img/pieces/bP.png"
      style={{ width: squareWidth, height: squareWidth }}
      alt="Black Pawn"
    />
  ),
  bN: ({ squareWidth }) => (
    <img
      src="/img/pieces/bN.png"
      style={{ width: squareWidth, height: squareWidth }}
      alt="Black Knight"
    />
  ),
  bB: ({ squareWidth }) => (
    <img
      src="/img/pieces/bB.png"
      style={{ width: squareWidth, height: squareWidth }}
      alt="Black Bishop"
    />
  ),
  bR: ({ squareWidth }) => (
    <img
      src="/img/pieces/bR.png"
      style={{ width: squareWidth, height: squareWidth }}
      alt="Black Rook"
    />
  ),
  bQ: ({ squareWidth }) => (
    <img
      src="/img/pieces/bQ.png"
      style={{ width: squareWidth, height: squareWidth }}
      alt="Black Queen"
    />
  ),
  bK: ({ squareWidth }) => (
    <img
      src="/img/pieces/bK.png"
      style={{ width: squareWidth, height: squareWidth }}
      alt="Black King"
    />
  ),
};

const App = () => {
  // State for tracking game state, Stockfish worker, best move, and evaluation score
  const [game, setGame] = useState(new Chess());
  const [stockfish, setStockfish] = useState(null);
  const [bestMove, setBestMove] = useState("");
  const [evaluation, setEvaluation] = useState("");

  useEffect(() => {
    // Initialize Stockfish as a Web Worker when the component mounts
    const stockfishWorker = new Worker(`${process.env.PUBLIC_URL}/js/stockfish-16.1-lite-single.js`);

    setStockfish(stockfishWorker);

    // Clean up the worker when the component unmounts
    return () => {
      stockfishWorker.terminate();
    };
  }, []);

  // Handle piece drop (move) on the chessboard
  const onDrop = (sourceSquare, targetSquare) => {
    const gameCopy = new Chess(game.fen()); // Clone the current game state

    try {
      const move = gameCopy.move({
        from: sourceSquare,
        to: targetSquare,
        promotion: "q", // Auto-promote to a queen
      });

      // If the move is invalid, return false to prevent it
      if (move === null) {
        return false;
      }

      setGame(gameCopy); // Update the game state with the new move

      // Send the updated position to Stockfish to get the best move and evaluation
      if (stockfish) {
        stockfish.postMessage(`position fen ${gameCopy.fen()}`); // Set the position in Stockfish
        stockfish.postMessage("go depth 15"); // Ask Stockfish to analyze to depth 15

        // Listen for messages from Stockfish and update best move and evaluation
        stockfish.onmessage = (event) => {
          const { bestMove, evaluation } = getEvaluation(event.data, game.turn());
          if (bestMove) setBestMove(bestMove); // Update the best move
          if (evaluation) setEvaluation(evaluation); // Update the evaluation score
        };
      }

      return true; // Return true if the move was successful
    } catch (error) {
      console.error(error.message); // Log error if an invalid move
      return false;
    }
  };

  return (
    <div>
      <h1>Chess Game with Stockfish</h1>
      {/* Chessboard component with custom pieces and onDrop handler */}
      <Chessboard
        position={game.fen()} // Current position from the game state
        onPieceDrop={onDrop} // Function to handle piece drops
        boardWidth={500} // Width of the chessboard in pixels
        customPieces={customPieces} // Pass custom pieces variable
      />
      {/* Display the best move and evaluation score */}
      <div>
        <h3>Best Move: {bestMove || "Calculating..."}</h3>
        <h3>Evaluation: {evaluation || "Evaluating..."}</h3>
      </div>
    </div>
  );
};

export default App; // Export the App component as the default export
Explanation
This full code example combines:
- Custom Pieces: Using the
customPiecesvariable, we display each custom image, sized to fit within each square. - Stockfish Integration: Moves are sent to Stockfish, which responds with the best move and evaluation, updating dynamically after each valid move.
- Chessboard Interaction: Users can drag and drop pieces on the chessboard, with the app validating moves and applying custom piece styles.
You should now see the following: 
Yes, my graphic design skills are not the best.
Adding Custom Square Colour
Customizing the square colors on a chessboard can create a unique look and make your application stand out. In this section, we’ll explore how to create a "White Stripe Theme" using CSS background colors and patterns. This guide will walk you through the steps, explaining each detail along the way.
Step 1: Define Our Theme Styles
To achieve a striped effect on each square, we’ll use a combination of background colors and patterns. We define these styles as JavaScript objects, which are later passed to our chessboard component. These styles control both the base color of each square (light or dark) and the overlay pattern.
Here’s how to define the styles for our theme:
// Define the White Stripe Theme with light and dark square patterns
const lightSquareStyle = {
  backgroundColor: "#FFFFFF", // Base color for light squares
  backgroundImage:
    "repeating-linear-gradient(-45deg, rgba(0, 0, 0, 0.1) 0, rgba(0, 0, 0, 0.1) 2px, transparent 2px, transparent 4px)", // Diagonal stripe pattern for light squares
};

const darkSquareStyle = {
  backgroundColor: "#CCCCCC", // Base color for dark squares
  backgroundImage:
    "repeating-linear-gradient(-45deg, rgba(0, 0, 0, 0.1) 0, rgba(0, 0, 0, 0.1) 2px, transparent 2px, transparent 4px)", // Diagonal stripe pattern for dark squares
};
Explanation of CSS Properties:
backgroundColor: This sets the base color for each square type (light or dark). Here, we’re using a light grey for dark squares (#CCCCCC) and white (#FFFFFF) for light squares.backgroundImage: This usesrepeating-linear-gradientto create a diagonal striped effect on each square.repeating-linear-gradientallows us to create repeating patterns with linear gradients.- Parameters of the Gradient:
-45deg: This sets the angle of the stripes to 45 degrees for a diagonal effect.rgba(0, 0, 0, 0.1): This sets a very light, semi-transparent black color to use for the stripes.- The subsequent numbers define the start and end of each line and gap, making a pattern where every 4px segment has a 2px line followed by a 2px transparent gap.
Experimenting with these parameters can yield different patterns, so feel free to adjust the colors and spacing for other effects!
Step 2: Apply the Theme to the Chessboard
Once we have our styles defined, we’ll pass them to the Chessboard component. The Chessboard component supports customLightSquareStyle and customDarkSquareStyle props, which we use to set the custom styles for light and dark squares, respectively.
Here’s how to apply our theme to the Chessboard component:
<Chessboard
  position={game.fen()}
  onPieceDrop={onDrop}
  boardWidth={500}
  customPieces={customPieces}
  customLightSquareStyle={lightSquareStyle} // Apply custom light square style
  customDarkSquareStyle={darkSquareStyle}   // Apply custom dark square style
/>
This code will render the chessboard with our Theme, giving each square a subtle striped pattern that enhances its appearance.
Full Code
Below is the complete code for integrating our theme with the chessboard:
import React, { useState, useEffect } from "react"; // Import React, useState, and useEffect hooks
import { Chessboard } from "react-chessboard"; // Import the Chessboard component
import { Chess } from "chess.js"; // Import the Chess library for game logic

// Function to parse Stockfish's output and extract the best move and evaluation
const getEvaluation = (message, turn) => {
  let result = { bestMove: "", evaluation: "" }; // Initialize result with default values

  // If the message starts with "bestmove", extract the best move from the message
  if (message.startsWith("bestmove")) {
    result.bestMove = message.split(" ")[1]; // The best move is the second word in the message
  }

  // Check for "info score" in the message to extract evaluation score
  if (message.includes("info") && message.includes("score")) {
    const scoreParts = message.split(" "); // Split message into words
    const scoreIndex = scoreParts.indexOf("score") + 2; // "cp" or "mate" is two words after "score"

    // If the score type is "cp" (centipawn), interpret it as a material advantage in pawns
    if (scoreParts[scoreIndex - 1] === "cp") {
      let score = parseInt(scoreParts[scoreIndex], 10); // Parse the score value
      if (turn !== "b") {
        score = -score; // Invert the score if it's White's turn
      }
      result.evaluation = score / 100; // Convert centipawns to pawns
    } else if (scoreParts[scoreIndex - 1] === "mate") {
      // If the score type is "mate", indicate moves until checkmate
      const mateIn = parseInt(scoreParts[scoreIndex], 10);
      result.evaluation = `Mate in ${Math.abs(mateIn)}`;
    }
  }

  return result; // Return the best move and evaluation
};

// Define custom pieces mapping for each piece to its corresponding image
const customPieces = {
  wP: ({ squareWidth }) => (
    <img
      src="/img/pieces/wP.png"
      style={{ width: squareWidth, height: squareWidth }}
      alt="White Pawn"
    />
  ),
  wN: ({ squareWidth }) => (
    <img
      src="/img/pieces/wN.png"
      style={{ width: squareWidth, height: squareWidth }}
      alt="White Knight"
    />
  ),
  wB: ({ squareWidth }) => (
    <img
      src="/img/pieces/wB.png"
      style={{ width: squareWidth, height: squareWidth }}
      alt="White Bishop"
    />
  ),
  wR: ({ squareWidth }) => (
    <img
      src="/img/pieces/wR.png"
      style={{ width: squareWidth, height: squareWidth }}
      alt="White Rook"
    />
  ),
  wQ: ({ squareWidth }) => (
    <img
      src="/img/pieces/wQ.png"
      style={{ width: squareWidth, height: squareWidth }}
      alt="White Queen"
    />
  ),
  wK: ({ squareWidth }) => (
    <img
      src="/img/pieces/wK.png"
      style={{ width: squareWidth, height: squareWidth }}
      alt="White King"
    />
  ),
  bP: ({ squareWidth }) => (
    <img
      src="/img/pieces/bP.png"
      style={{ width: squareWidth, height: squareWidth }}
      alt="Black Pawn"
    />
  ),
  bN: ({ squareWidth }) => (
    <img
      src="/img/pieces/bN.png"
      style={{ width: squareWidth, height: squareWidth }}
      alt="Black Knight"
    />
  ),
  bB: ({ squareWidth }) => (
    <img
      src="/img/pieces/bB.png"
      style={{ width: squareWidth, height: squareWidth }}
      alt="Black Bishop"
    />
  ),
  bR: ({ squareWidth }) => (
    <img
      src="/img/pieces/bR.png"
      style={{ width: squareWidth, height: squareWidth }}
      alt="Black Rook"
    />
  ),
  bQ: ({ squareWidth }) => (
    <img
      src="/img/pieces/bQ.png"
      style={{ width: squareWidth, height: squareWidth }}
      alt="Black Queen"
    />
  ),
  bK: ({ squareWidth }) => (
    <img
      src="/img/pieces/bK.png"
      style={{ width: squareWidth, height: squareWidth }}
      alt="Black King"
    />
  ),
};

// Define custom square styles for the "White Stripe Theme"
const lightSquareStyle = {
  backgroundColor: "#FFFFFF", // Light square base color
  backgroundImage:
    "repeating-linear-gradient(-45deg, rgba(0, 0, 0, 0.1) 0, rgba(0, 0, 0, 0.1) 2px, transparent 2px, transparent 4px)", // Light square stripe pattern
};

const darkSquareStyle = {
  backgroundColor: "#CCCCCC", // Dark square base color
  backgroundImage:
    "repeating-linear-gradient(-45deg, rgba(0, 0, 0, 0.1) 0, rgba(0, 0, 0, 0.1) 2px, transparent 2px, transparent 4px)", // Dark square stripe pattern
};

const App = () => {
  // State variables for chess game logic, Stockfish worker, best move, and evaluation
  const [game, setGame] = useState(new Chess()); // Chess game instance
  const [stockfish, setStockfish] = useState(null); // Stockfish Web Worker instance
  const [bestMove, setBestMove] = useState(""); // Best move suggested by Stockfish
  const [evaluation, setEvaluation] = useState(""); // Evaluation of the position by Stockfish

  // useEffect hook to initialize the Stockfish Web Worker
  useEffect(() => {
    const stockfishWorker = new Worker(`${process.env.PUBLIC_URL}/js/stockfish-16.1-lite-single.js`);

    setStockfish(stockfishWorker);

    // Terminate the worker when the component unmounts
    return () => {
      stockfishWorker.terminate();
    };
  }, []);

  // Function to handle piece drop events on the chessboard
  const onDrop = (sourceSquare, targetSquare) => {
    const gameCopy = new Chess(game.fen()); // Clone the current game state

    try {
      const move = gameCopy.move({
        from: sourceSquare,
        to: targetSquare,
        promotion: "q", // Always promote to a queen for simplicity
      });

      // If the move is invalid, return false to prevent it
      if (move === null) {
        return false;
      }

      setGame(gameCopy); // Update the game state with the new move

      // Send the updated position to Stockfish for analysis
      if (stockfish) {
        stockfish.postMessage(`position fen ${gameCopy.fen()}`); // Set the position in Stockfish
        stockfish.postMessage("go depth 15"); // Ask Stockfish to analyze to depth 15

        // Listen for messages from Stockfish and update best move and evaluation
        stockfish.onmessage = (event) => {
          const { bestMove, evaluation } = getEvaluation(event.data, game.turn());
          if (bestMove) setBestMove(bestMove); // Update the best move
          if (evaluation) setEvaluation(evaluation); // Update the evaluation score
        };
      }

      return true; // Return true if the move was valid
    } catch (error) {
      console.error("Invalid move:", error.message); // Log error if an invalid move
      return false;
    }
  };

  return (
    <div>
      <h1>Chess Game with Stockfish</h1>
      {/* Chessboard component with custom pieces and square styles */}
      <Chessboard
        position={game.fen()} // Current position from the game state
        onPieceDrop={onDrop} // Function to handle piece drops
        boardWidth={500} // Width of the chessboard in pixels
        customPieces={customPieces} // Custom pieces mapping
        customLightSquareStyle={lightSquareStyle} // Apply custom light square style
        customDarkSquareStyle={darkSquareStyle}   // Apply custom dark square style
      />
      {/* Display the best move and evaluation score */}
      <div>
        <h3>Best Move: {bestMove || "Calculating..."}</h3>
        <h3>Evaluation: {evaluation || "Evaluating..."}</h3>
      </div>
    </div>
  );
};

export default App; // Export the App component as the default export
You should now see the following:
Adding Custom Square Highlighting
Adding square highlighting for the last move provides visual feedback and helps users track recent moves on the board. In this section, we’ll implement a feature to highlight the from and to squares of the last moved piece using different colors. This feature will be stored in useState so we can dynamically update the highlights after each move.
Step 1: Add State for Tracking the Last Move
In React, useState is a hook that allows us to create and manage state within functional components. Here, we’ll use useState to store the coordinates of the from and to squares of the last move. When a move is made, these states will be updated with the new from and to squares.
Add two new useState variables to manage the last move's from and to squares.
// State variables for tracking the last move's from and to squares
const [fromSquare, setFromSquare] = useState(null); // Holds the starting square of the last move
const [toSquare, setToSquare] = useState(null);     // Holds the destination square of the last move
fromSquare: Tracks the starting square of the last moved piece.toSquare: Tracks the destination square of the last moved piece.
Each time a move is made, we’ll update these states to reflect the squares involved.
Step 2: Update fromSquare and toSquare in the onDrop Function
The onDrop function is triggered every time a piece is moved on the board. It takes two parameters: sourceSquare (the square the piece is moved from) and targetSquare (the square the piece is moved to).
After validating the move, we’ll use setFromSquare and setToSquare to update these values.
Add this code to the onDrop function, after a move is confirmed:
const onDrop = (sourceSquare, targetSquare) => {
  const gameCopy = new Chess(game.fen()); // Clone the current game state

  try {
    const move = gameCopy.move({
      from: sourceSquare,
      to: targetSquare,
      promotion: "q", // Always promote to a queen for simplicity
    });

    if (move === null) {
      return false; // If the move is invalid, return false to prevent it
    }

    setGame(gameCopy); // Update the game state with the new move

    // Update last move states for highlighting
    setFromSquare(sourceSquare); // Update the starting square of the last move
    setToSquare(targetSquare);   // Update the destination square of the last move

    // Send the updated position to Stockfish for analysis
    if (stockfish) {
      stockfish.postMessage(`position fen ${gameCopy.fen()}`);
      stockfish.postMessage("go depth 15");

      stockfish.onmessage = (event) => {
        const { bestMove, evaluation } = getEvaluation(event.data, game.turn());
        if (bestMove) setBestMove(bestMove);
        if (evaluation) setEvaluation(evaluation);
      };
    }

    return true;
  } catch (error) {
    console.error(error.message); // Log error if an invalid move
    return false;
  }
};
Here’s what each part does:
- Move Validation: If the move is invalid, we return
falseand exit the function. - Updating the Game State: After confirming a valid move, we update the game state.
- Updating Highlight States: We update
fromSquareandtoSquareusingsetFromSquareandsetToSquareto store the coordinates of the last move. - Stockfish Analysis: If Stockfish is running, we send the new position to Stockfish for analysis.
Step 3: Define Custom Styles for the Highlighted Squares
Now, let’s define the colors for the from and to squares. For example, we can set a light blue for the from square and a light green for the to square.
We’ll create a helper function getSquareStyles to dynamically return these styles based on fromSquare and toSquare.
const getSquareStyles = () => {
  const styles = {}; // Initialize an empty object for square styles
  if (fromSquare) {
    styles[fromSquare] = { backgroundColor: "rgba(173, 216, 230, 0.8)" }; // Light blue for the from-square
  }
  if (toSquare) {
    styles[toSquare] = { backgroundColor: "rgba(144, 238, 144, 0.8)" }; // Light green for the to-square
  }
  return styles; // Return the styles object
};
Explanation:
fromSquareandtoSquare: If these states contain values, we apply a color style to the respective squares.- Returning the styles: This function generates an object where each key is a square (e.g.,
"e2") and the value is the CSS style to apply to that square.
Customizing the Styles:
- You can modify the colors or other CSS properties to create unique square highlights. Here are some ideas:
- Different Colors: Use any color by changing the
backgroundColorproperty. - Border Effects: Add a border to the squares, such as
{ border: "2px solid yellow" }. - Opacity Adjustments: Control transparency with
rgbavalues to blend or darken colors as desired. - Additional Effects: CSS properties like
boxShadowcan add depth (e.g.,{ boxShadow: "0px 0px 10px rgba(0,0,0,0.5)" }).
- Different Colors: Use any color by changing the
By customizing getSquareStyles, you can fully control the appearance of the highlighted squares, making it easier to track moves in a style that suits your application’s aesthetic.
Step 4: Pass the Square Styles to the Chessboard Component
Now, we’ll use the customSquareStyles prop on the Chessboard component to apply our highlights. This prop takes an object of styles, so we’ll pass the result of getSquareStyles().
<Chessboard
  position={game.fen()}
  onPieceDrop={onDrop}
  boardWidth={500}
  customPieces={customPieces}
  customLightSquareStyle={lightSquareStyle}
  customDarkSquareStyle={darkSquareStyle}
  customSquareStyles={getSquareStyles()} // Apply last move highlight styles
/>
This setup will dynamically highlight the from and to squares of the last move with custom colors, making it easier for users to track recent moves.
Full Code
Below is the complete code with the new custom square highlighting feature added.
import React, { useState, useEffect } from "react"; // Import React and React hooks
import { Chessboard } from "react-chessboard"; // Import the Chessboard component
import { Chess } from "chess.js"; // Import the Chess library for game logic

// Function to parse Stockfish's output and extract the best move and evaluation
const getEvaluation = (message, turn) => {
  let result = { bestMove: "", evaluation: "" }; // Initialize result with default values

  // If the message starts with "bestmove", extract the best move from the message
  if (message.startsWith("bestmove")) {
    result.bestMove = message.split(" ")[1]; // The best move is the second word in the message
  }

  // Check for "info score" in the message to extract evaluation score
  if (message.includes("info") && message.includes("score")) {
    const scoreParts = message.split(" "); // Split message into words
    const scoreIndex = scoreParts.indexOf("score") + 2; // "cp" or "mate" is two words after "score"

    // If the score type is "cp" (centipawn), interpret it as a material advantage in pawns
    if (scoreParts[scoreIndex - 1] === "cp") {
      let score = parseInt(scoreParts[scoreIndex], 10); // Parse the score value
      if (turn !== "b") {
        score = -score; // Invert the score if it's White's turn
      }
      result.evaluation = score / 100; // Convert centipawns to pawns
    } else if (scoreParts[scoreIndex - 1] === "mate") {
      // If the score type is "mate", indicate moves until checkmate
      const mateIn = parseInt(scoreParts[scoreIndex], 10);
      result.evaluation = `Mate in ${Math.abs(mateIn)}`;
    }
  }

  return result; // Return the best move and evaluation
};

// Define custom pieces mapping for each piece to its corresponding image
const customPieces = {
  wP: ({ squareWidth }) => (
    <img
      src="/img/pieces/wP.png"
      style={{ width: squareWidth, height: squareWidth }}
      alt="White Pawn"
    />
  ),
  wN: ({ squareWidth }) => (
    <img
      src="/img/pieces/wN.png"
      style={{ width: squareWidth, height: squareWidth }}
      alt="White Knight"
    />
  ),
  wB: ({ squareWidth }) => (
    <img
      src="/img/pieces/wB.png"
      style={{ width: squareWidth, height: squareWidth }}
      alt="White Bishop"
    />
  ),
  wR: ({ squareWidth }) => (
    <img
      src="/img/pieces/wR.png"
      style={{ width: squareWidth, height: squareWidth }}
      alt="White Rook"
    />
  ),
  wQ: ({ squareWidth }) => (
    <img
      src="/img/pieces/wQ.png"
      style={{ width: squareWidth, height: squareWidth }}
      alt="White Queen"
    />
  ),
  wK: ({ squareWidth }) => (
    <img
      src="/img/pieces/wK.png"
      style={{ width: squareWidth, height: squareWidth }}
      alt="White King"
    />
  ),
  bP: ({ squareWidth }) => (
    <img
      src="/img/pieces/bP.png"
      style={{ width: squareWidth, height: squareWidth }}
      alt="Black Pawn"
    />
  ),
  bN: ({ squareWidth }) => (
    <img
      src="/img/pieces/bN.png"
      style={{ width: squareWidth, height: squareWidth }}
      alt="Black Knight"
    />
  ),
  bB: ({ squareWidth }) => (
    <img
      src="/img/pieces/bB.png"
      style={{ width: squareWidth, height: squareWidth }}
      alt="Black Bishop"
    />
  ),
  bR: ({ squareWidth }) => (
    <img
      src="/img/pieces/bR.png"
      style={{ width: squareWidth, height: squareWidth }}
      alt="Black Rook"
    />
  ),
  bQ: ({ squareWidth }) => (
    <img
      src="/img/pieces/bQ.png"
      style={{ width: squareWidth, height: squareWidth }}
      alt="Black Queen"
    />
  ),
  bK: ({ squareWidth }) => (
    <img
      src="/img/pieces/bK.png"
      style={{ width: squareWidth, height: squareWidth }}
      alt="Black King"
    />
  ),
};

// Define custom square styles for the "White Stripe Theme"
const lightSquareStyle = {
  backgroundColor: "#FFFFFF", // Light square base color
  backgroundImage:
    "repeating-linear-gradient(-45deg, rgba(0, 0, 0, 0.1) 0, rgba(0, 0, 0, 0.1) 2px, transparent 2px, transparent 4px)", // Light square stripe pattern
};

const darkSquareStyle = {
  backgroundColor: "#CCCCCC", // Dark square base color
  backgroundImage:
    "repeating-linear-gradient(-45deg, rgba(0, 0, 0, 0.1) 0, rgba(0, 0, 0, 0.1) 2px, transparent 2px, transparent 4px)", // Dark square stripe pattern
};

const App = () => {
  // State variables for chess game logic, Stockfish worker, best move, and evaluation
  const [game, setGame] = useState(new Chess()); // Chess game instance
  const [stockfish, setStockfish] = useState(null); // Stockfish Web Worker instance
  const [bestMove, setBestMove] = useState(""); // Best move suggested by Stockfish
  const [evaluation, setEvaluation] = useState(""); // Evaluation of the position by Stockfish

  // State variables for tracking the last move's from and to squares
  const [fromSquare, setFromSquare] = useState(null); // Holds the starting square of the last move
  const [toSquare, setToSquare] = useState(null);     // Holds the destination square of the last move

  // useEffect hook to initialize the Stockfish Web Worker
  useEffect(() => {
    const stockfishWorker = new Worker(`${process.env.PUBLIC_URL}/js/stockfish-16.1-lite-single.js`);

    setStockfish(stockfishWorker);

    // Terminate the worker when the component unmounts
    return () => {
      stockfishWorker.terminate();
    };
  }, []);

  // Function to handle piece drop events on the chessboard
  const onDrop = (sourceSquare, targetSquare) => {
    const gameCopy = new Chess(game.fen()); // Clone the current game state

    try {
      const move = gameCopy.move({
        from: sourceSquare,
        to: targetSquare,
        promotion: "q", // Always promote to a queen for simplicity
      });

      // If the move is invalid, return false to prevent it
      if (move === null) {
        return false;
      }

      setGame(gameCopy); // Update the game state with the new move

      // Update last move states for highlighting
      setFromSquare(sourceSquare); // Update the starting square of the last move
      setToSquare(targetSquare);   // Update the destination square of the last move

      // Send the updated position to Stockfish for analysis
      if (stockfish) {
        stockfish.postMessage(`position fen ${gameCopy.fen()}`); // Set the position in Stockfish
        stockfish.postMessage("go depth 15"); // Ask Stockfish to analyze to depth 15

        // Listen for messages from Stockfish and update best move and evaluation
        stockfish.onmessage = (event) => {
          const { bestMove, evaluation } = getEvaluation(event.data, game.turn());
          if (bestMove) setBestMove(bestMove); // Update the best move
          if (evaluation) setEvaluation(evaluation); // Update the evaluation score
        };
      }

      return true; // Return true if the move was valid
    } catch (error) {
      console.error(error.message); // Log error if an invalid move
      return false;
    }
  };

  // Function to define custom styles for the last move's from and to squares
  const getSquareStyles = () => {
    const styles = {}; // Initialize an empty object for square styles
    if (fromSquare) {
      styles[fromSquare] = { backgroundColor: "rgba(173, 216, 230, 0.8)" }; // Light blue for the from-square
    }
    if (toSquare) {
      styles[toSquare] = { backgroundColor: "rgba(144, 238, 144, 0.8)" }; // Light green for the to-square
    }
    return styles; // Return the styles object
  };

  return (
    <div>
      <h1>Chess Game with Stockfish</h1>
      {/* Chessboard component with custom pieces and square styles */}
      <Chessboard
        position={game.fen()} // Current position from the game state
        onPieceDrop={onDrop} // Function to handle piece drops
        boardWidth={500} // Width of the chessboard in pixels
        customPieces={customPieces} // Custom pieces mapping
        customLightSquareStyle={lightSquareStyle} // Apply custom light square style
        customDarkSquareStyle={darkSquareStyle} // Apply custom dark square style
        customSquareStyles={getSquareStyles()} // Apply last move highlight styles
      />
      {/* Display the best move and evaluation score */}
      <div>
        <h3>Best Move: {bestMove || "Calculating..."}</h3>
        <h3>Evaluation: {evaluation || "Evaluating..."}</h3>
      </div>
    </div>
  );
};

export default App; // Export the App component as the default export
You should now see the following: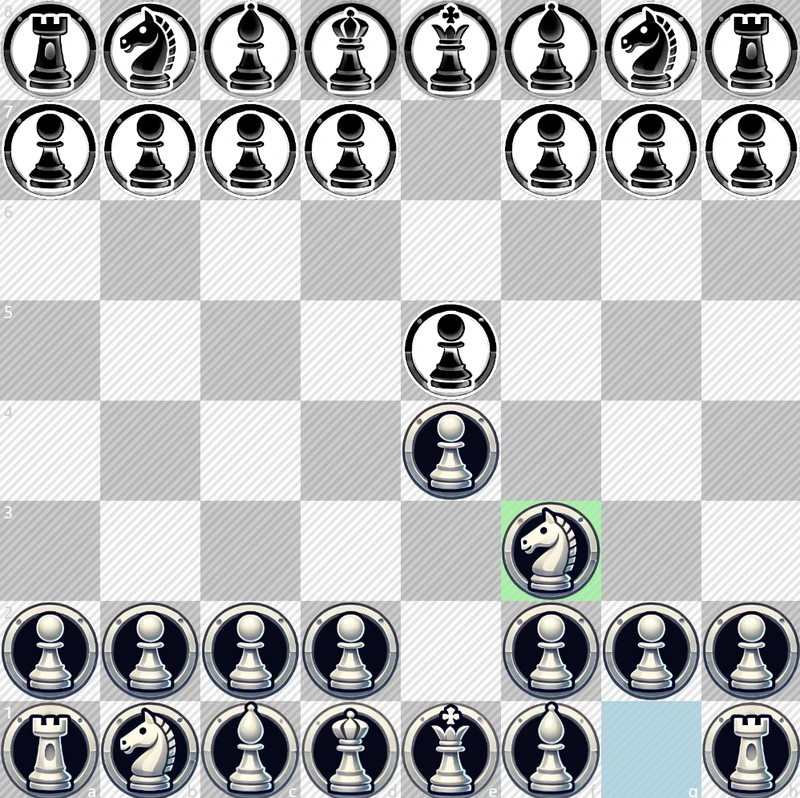
Adding Coloured Arrows
Adding an arrow to the chessboard based on the best move suggested by the chess engine can enhance the user experience by visually guiding them through the optimal move. In this section, we’ll walk through how to display an arrow between squares on the board using react-chessboard’s customArrows and customArrowColor properties.
The best move returned by Stockfish comes as a string of four characters, where the first two characters represent the starting square (e.g., "e2") and the last two characters represent the ending square (e.g., "e4"). We’ll extract these values and use them to create an arrow on the board.
Step 1: Set Up State for the Arrow
To store the coordinates of the arrow, we’ll create a useState variable. This variable will be an array containing the starting and ending squares of the best move.
Add this to your component:
// State to hold the best move's starting and ending squares for the arrow
const [bestMoveArrow, setBestMoveArrow] = useState([]);
Here, bestMoveArrow will store the arrow information as an array where each entry represents an arrow with from and to squares.
Step 2: Update Arrow State Based on Best Move
Whenever the best move from Stockfish updates, we’ll extract the from and to squares from the best move string and use these values to update bestMoveArrow.
In the function where you handle the best move, update bestMoveArrow as follows:
if (bestMove) {
  // Extract starting and ending squares from the best move
  const fromSquare = bestMove.slice(0, 2); // First two characters
  const toSquare = bestMove.slice(2, 4);   // Last two characters

  // Update the arrow state to draw an arrow for the best move
  setBestMoveArrow([[fromSquare, toSquare]]);
}
In this code:
fromSquareandtoSquareare derived from the best move string.setBestMoveArrowsets these values as an arrow on the board, whichreact-chessboardwill render as soon asbestMoveArrowupdates.
Step 3: Set the Arrow Color with customArrowColor
To make the arrow more visually distinct, we can add the customArrowColor property in the Chessboard component. This property accepts a CSS color value like #FF0000 or rgba(0, 0, 255, 0.6), which will be applied to all arrows on the board.
For example, we’ll define a semi-transparent blue color for our arrow:
const arrowColor = "rgba(0, 0, 255, 0.6)"; // Define custom arrow color
Step 4: Use customArrows and customArrowColor in the Chessboard Component
Finally, add customArrows={bestMoveArrow} and customArrowColor={arrowColor} to the Chessboard component to render the arrow with the specified color.
Your Chessboard component setup should look like this:
<Chessboard
  position={game.fen()} // Current board position from the game state
  onPieceDrop={onDrop} // Function to handle piece drops
  boardWidth={500} // Set the board width
  customPieces={customPieces} // Custom pieces if you have them
  customLightSquareStyle={lightSquareStyle} // Style for light squares
  customDarkSquareStyle={darkSquareStyle} // Style for dark squares
  customArrows={bestMoveArrow} // Pass the best move arrow to render on the board
  customArrowColor={arrowColor} // Set the custom arrow color
/>
Full Code
Here's the complete implementation of this feature in the context of the full component:
import React, { useState, useEffect } from "react"; // Import React and React hooks
import { Chessboard } from "react-chessboard"; // Import the Chessboard component
import { Chess } from "chess.js"; // Import the Chess library for game logic

// Function to parse Stockfish's output and extract the best move and evaluation
const getEvaluation = (message, turn) => {
  let result = { bestMove: "", evaluation: "" }; // Initialize result with default values

  // If the message starts with "bestmove", extract the best move from the message
  if (message.startsWith("bestmove")) {
    result.bestMove = message.split(" ")[1]; // The best move is the second word in the message
  }

  // Check for "info score" in the message to extract evaluation score
  if (message.includes("info") && message.includes("score")) {
    const scoreParts = message.split(" "); // Split message into words
    const scoreIndex = scoreParts.indexOf("score") + 2; // "cp" or "mate" is two words after "score"

    // If the score type is "cp" (centipawn), interpret it as a material advantage in pawns
    if (scoreParts[scoreIndex - 1] === "cp") {
      let score = parseInt(scoreParts[scoreIndex], 10); // Parse the score value
      if (turn !== "b") {
        score = -score; // Invert the score if it's White's turn
      }
      result.evaluation = score / 100; // Convert centipawns to pawns
    } else if (scoreParts[scoreIndex - 1] === "mate") {
      // If the score type is "mate", indicate moves until checkmate
      const mateIn = parseInt(scoreParts[scoreIndex], 10);
      result.evaluation = `Mate in ${Math.abs(mateIn)}`;
    }
  }

  return result; // Return the best move and evaluation
};

// Define custom pieces mapping for each piece to its corresponding image
const customPieces = {
  // White pieces with images and styles
  wP: ({ squareWidth }) => (
    <img
      src="/img/pieces/wP.png"
      style={{ width: squareWidth, height: squareWidth }}
      alt="White Pawn"
    />
  ),
  wN: ({ squareWidth }) => (
    <img
      src="/img/pieces/wN.png"
      style={{ width: squareWidth, height: squareWidth }}
      alt="White Knight"
    />
  ),
  wB: ({ squareWidth }) => (
    <img
      src="/img/pieces/wB.png"
      style={{ width: squareWidth, height: squareWidth }}
      alt="White Bishop"
    />
  ),
  wR: ({ squareWidth }) => (
    <img
      src="/img/pieces/wR.png"
      style={{ width: squareWidth, height: squareWidth }}
      alt="White Rook"
    />
  ),
  wQ: ({ squareWidth }) => (
    <img
      src="/img/pieces/wQ.png"
      style={{ width: squareWidth, height: squareWidth }}
      alt="White Queen"
    />
  ),
  wK: ({ squareWidth }) => (
    <img
      src="/img/pieces/wK.png"
      style={{ width: squareWidth, height: squareWidth }}
      alt="White King"
    />
  ),
  // Black pieces with images and styles
  bP: ({ squareWidth }) => (
    <img
      src="/img/pieces/bP.png"
      style={{ width: squareWidth, height: squareWidth }}
      alt="Black Pawn"
    />
  ),
  bN: ({ squareWidth }) => (
    <img
      src="/img/pieces/bN.png"
      style={{ width: squareWidth, height: squareWidth }}
      alt="Black Knight"
    />
  ),
  bB: ({ squareWidth }) => (
    <img
      src="/img/pieces/bB.png"
      style={{ width: squareWidth, height: squareWidth }}
      alt="Black Bishop"
    />
  ),
  bR: ({ squareWidth }) => (
    <img
      src="/img/pieces/bR.png"
      style={{ width: squareWidth, height: squareWidth }}
      alt="Black Rook"
    />
  ),
  bQ: ({ squareWidth }) => (
    <img
      src="/img/pieces/bQ.png"
      style={{ width: squareWidth, height: squareWidth }}
      alt="Black Queen"
    />
  ),
  bK: ({ squareWidth }) => (
    <img
      src="/img/pieces/bK.png"
      style={{ width: squareWidth, height: squareWidth }}
      alt="Black King"
    />
  ),
};

// Define custom square styles for the "White Stripe Theme"
const lightSquareStyle = {
  backgroundColor: "#FFFFFF", // Light square base color
  backgroundImage:
    "repeating-linear-gradient(-45deg, rgba(0, 0, 0, 0.1) 0, rgba(0, 0, 0, 0.1) 2px, transparent 2px, transparent 4px)", // Light square stripe pattern
};

const darkSquareStyle = {
  backgroundColor: "#CCCCCC", // Dark square base color
  backgroundImage:
    "repeating-linear-gradient(-45deg, rgba(0, 0, 0, 0.1) 0, rgba(0, 0, 0, 0.1) 2px, transparent 2px, transparent 4px)", // Dark square stripe pattern
};

const App = () => {
  // State variables for chess game logic, Stockfish worker, best move, and evaluation
  const [game, setGame] = useState(new Chess()); // Chess game instance
  const [stockfish, setStockfish] = useState(null); // Stockfish Web Worker instance
  const [bestMove, setBestMove] = useState(""); // Best move suggested by Stockfish
  const [evaluation, setEvaluation] = useState(""); // Evaluation of the position by Stockfish
  const [bestMoveArrow, setBestMoveArrow] = useState([]); // Stores arrow based on best move
  const arrowColor = "rgba(0, 0, 255, 0.6)"; // Custom arrow color

  // State variables for tracking the last move's from and to squares
  const [fromSquare, setFromSquare] = useState(null); // Holds the starting square of the last move
  const [toSquare, setToSquare] = useState(null); // Holds the destination square of the last move

  // useEffect hook to initialize the Stockfish Web Worker
  useEffect(() => {
    const stockfishWorker = new Worker(`${process.env.PUBLIC_URL}/js/stockfish-16.1-lite-single.js`);

    setStockfish(stockfishWorker);

    // Terminate the worker when the component unmounts
    return () => {
      stockfishWorker.terminate();
    };
  }, []);

  // Function to handle piece drop events on the chessboard
  const onDrop = (sourceSquare, targetSquare) => {
    const gameCopy = new Chess(game.fen()); // Clone the current game state

    try {
      const move = gameCopy.move({
        from: sourceSquare,
        to: targetSquare,
        promotion: "q", // Always promote to a queen for simplicity
      });

      // If the move is invalid, return false to prevent it
      if (move === null) {
        return false;
      }

      setGame(gameCopy); // Update the game state with the new move

      // Update last move states for highlighting
      setFromSquare(sourceSquare); // Update the starting square of the last move
      setToSquare(targetSquare); // Update the destination square of the last move

      // Send the updated position to Stockfish for analysis
      if (stockfish) {
        stockfish.postMessage(`position fen ${gameCopy.fen()}`); // Set the position in Stockfish
        stockfish.postMessage("go depth 15"); // Ask Stockfish to analyze to depth 15

        // Listen for messages from Stockfish and update best move and evaluation
        stockfish.onmessage = (event) => {
          const { bestMove, evaluation } = getEvaluation(
            event.data,
            game.turn()
          );
          if (bestMove) {
            setBestMove(bestMove); // Update the best move
            setBestMoveArrow([[bestMove.slice(0, 2), bestMove.slice(2, 4)]]); // Set arrow for best move
          }
          if (evaluation) setEvaluation(evaluation); // Update the evaluation score
        };
      }

      return true; // Return true if the move was valid
    } catch (error) {
      console.error(error.message); // Log error if an invalid move
      return false;
    }
  };

  // Function to define custom styles for the last move's from and to squares
  const getSquareStyles = () => {
    const styles = {}; // Initialize an empty object for square styles
    if (fromSquare) {
      styles[fromSquare] = { backgroundColor: "rgba(173, 216, 230, 0.8)" }; // Light blue for the from-square
    }
    if (toSquare) {
      styles[toSquare] = { backgroundColor: "rgba(144, 238, 144, 0.8)" }; // Light green for the to-square
    }
    return styles; // Return the styles object
  };

  return (
    <div>
      <h1>Chess Game with Stockfish</h1>
      {/* Chessboard component with custom pieces, square styles, and custom arrow */}
      <Chessboard
        position={game.fen()} // Current position from the game state
        onPieceDrop={onDrop} // Function to handle piece drops
        boardWidth={500} // Width of the chessboard in pixels
        customPieces={customPieces} // Custom pieces mapping
        customLightSquareStyle={lightSquareStyle} // Apply custom light square style
        customDarkSquareStyle={darkSquareStyle} // Apply custom dark square style
        customSquareStyles={getSquareStyles()} // Apply last move highlight styles
        customArrows={bestMoveArrow} // Draws the best move arrow on the board
        customArrowColor={arrowColor} // Set the custom arrow color
      />
      {/* Display the best move and evaluation score */}
      <div>
        <h3>Best Move: {bestMove || "Calculating..."}</h3>
        <h3>Evaluation: {evaluation || "Evaluating..."}</h3>
      </div>
    </div>
  );
};

export default App; // Export the App component as the default export
You should now see the following:
Summary
In this blog, we explored how to customize a chessboard application with interactive features using React and the react-chessboard library. Starting from setting up a functional chessboard, we added powerful enhancements to bring the game to life.
- Custom Chess Pieces and Board Styling: We demonstrated how to create a unique look for the chessboard by applying custom images for each piece and adding a striped theme to the board squares.
- Move Tracking with Square Highlights: To enhance gameplay visibility, we implemented square highlighting for the last move, using distinct colors to show the starting and ending squares. This feature makes it easy to follow the most recent moves in a visually engaging way.
- Best Move Arrows Using Stockfish: By integrating Stockfish, a powerful chess engine, we enabled the chessboard to analyze positions and return the best move. We took this output and dynamically rendered an arrow pointing from the starting square to the destination square, making the engine’s recommendations easy to visualize.
Each of these features enhances the chess experience, making it more interactive and visually appealing. With custom styling, real-time engine suggestions, and intuitive move tracking, this guide provides a strong foundation for creating a sophisticated and engaging chess application.
Learn more
- React – A JavaScript library for building user interfaces.
- react-chessboard – A React component for rendering a chessboard.
- chess.js – A library for handling chess game rules and move validation.
- Stockfish – A powerful open-source chess engine.
- stockfish.js – A JavaScript and WebAssembly version of Stockfish for web applications.
- CSS – A styling language used to design and customize HTML elements.
You may also like
 HollowLeaf
Chess Web Programming: Part Two: Stockfish
Integrating Stockfish into our Chess Web Application. HollowLeaf
Chess Web Programming: Part Six: Essential Resources
Essential Resources for your next Chess Web Application HollowLeaf
Integrating Maia2 (The Human-Like Chess Engine) into My Chess Application
A beginner-friendly look at human-style AI, neural networks, ONNX models, opening books, and everyth… HollowLeaf
Chess Web Programming: Part Five: Game Review
Creating a Game Review Application HollowLeaf
Chess Web Programming: Part One: Getting Started
Getting Started with Chess Web Application Programming HollowLeaf