
Photo by E Hillsley on Unsplash
An amazing victory in the Pirc
When you are playing in an Olympiad, your team counts on you
Hi guys,
The Pirc is taking revenge! Not even two weeks have passed after a sparkling crushing of the Pirc, as I've kept getting questions about the other side of it.
Yes, the Pirc is an unbalanced and aggressive opening. Like a compressed spring, it can be cramped at first but then go off with great energy. When it does, it can look impressive.
So here is a pretty famous game – but it bears so many attacking ideas to learn from. IM Hans Kestler shows style in crushing a top GM with the Pirc.
Two points to keep in mind:
- Gyula Sax (White) was a very strong GM, ranked 12 in the world at his peak, was Hungarian champion more than once and twice participant of the Candidates. No joke, in a word.
- This was played at an Olympiad in Nice, France. So just see how Black played and sacrificed – and this is with his teammates counting on him!
Gyula Sax – Hans-Guenther Kestler
1. e4 d6 2. Nc3 g6 3. d4 Bg7 4. Be2 Nf6
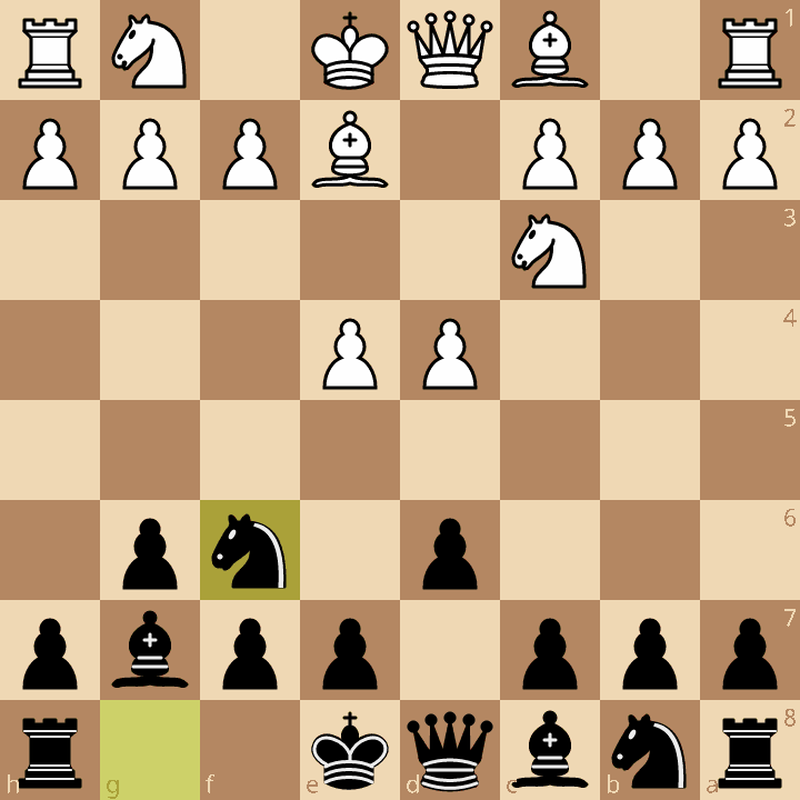
With 4...Nf6, we have transposed into a Pirc. White has chosen a seemingly quiet line with Be2, but it may become dangerous later, as the following move suggests.
5. h4
This Bayonet Attack is the purpose behind Be2. White wants to break through on the h-file immediately – or weaken Black's structures.
5...h5 6. Bg5 c6 7. Qd2 Qc7 8. O-O-O

White has provoked ...h5 and has now defined his king's position. This gives Black a strategic goal of counterattack, the most exciting thing about the Pirc/Modern Defense.
8...Nbd7 9. f4
Looks dangerous. However, Black has not given the address of his king yet.
9...b5 10. Bf3 b4 11. Nce2 a5 12. f5
Things are beginning to get hot. White is trying to break through in the center and weaken Black's fortifications. Worse than that, Black has to take this one – or else 13. fxg6 will smash Black's position into shatters.
12...gxf5 13. exf5 Nb6 14. Ng3 Nc4 15. Qe2 d5
In the face of an imminent danger, Black is cold-headedly building up his presence on the queenside.
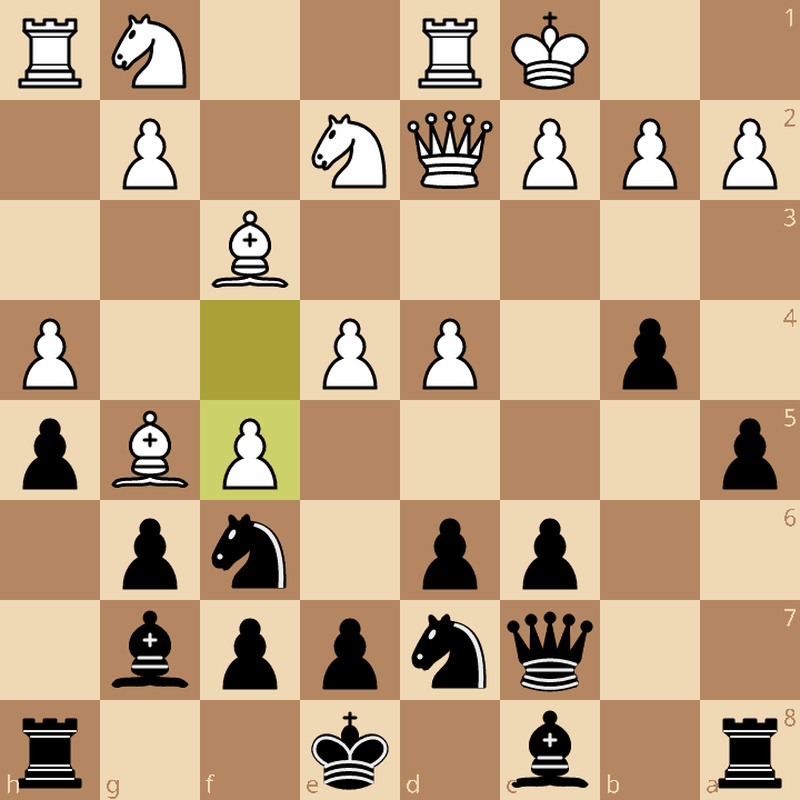
16. Nxh5 Rxh5!
The first sacrifice – and already puzzling for White. Was Black's rook on h8 doing much? So it gets sacrificed for White's active knight, which could have wreaked some real havoc. A strategical decision worth remembering.
17. Bxh5
Doesn't this look threatening to Black? In response, he goes on chipping at White's queenside defenses.
17...a4 18. Nh3 b3 19. cxb3 axb3 20. a3
And now White has it all defended and safe. Or does he?
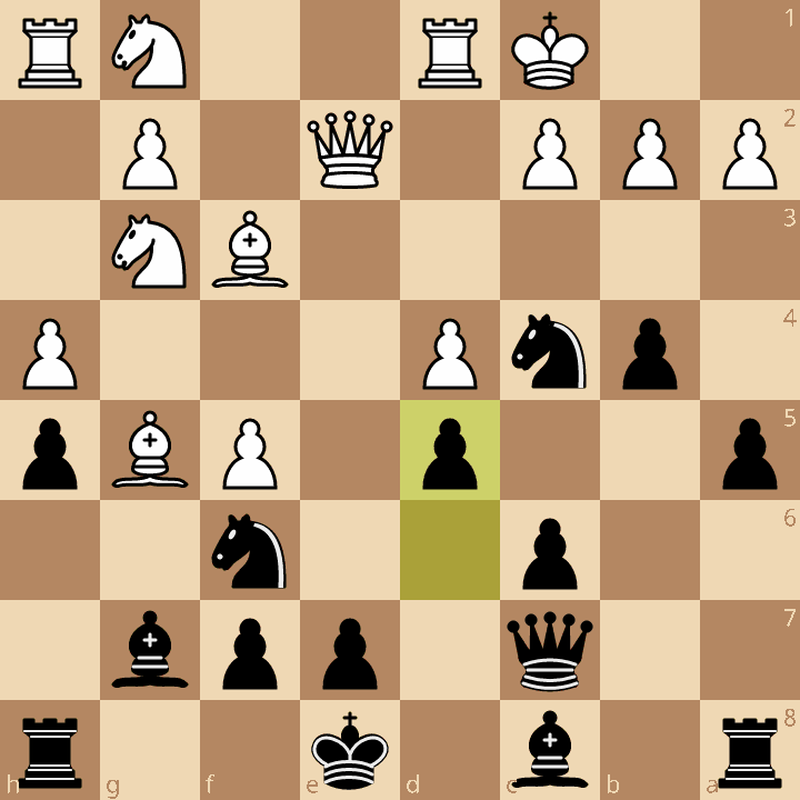
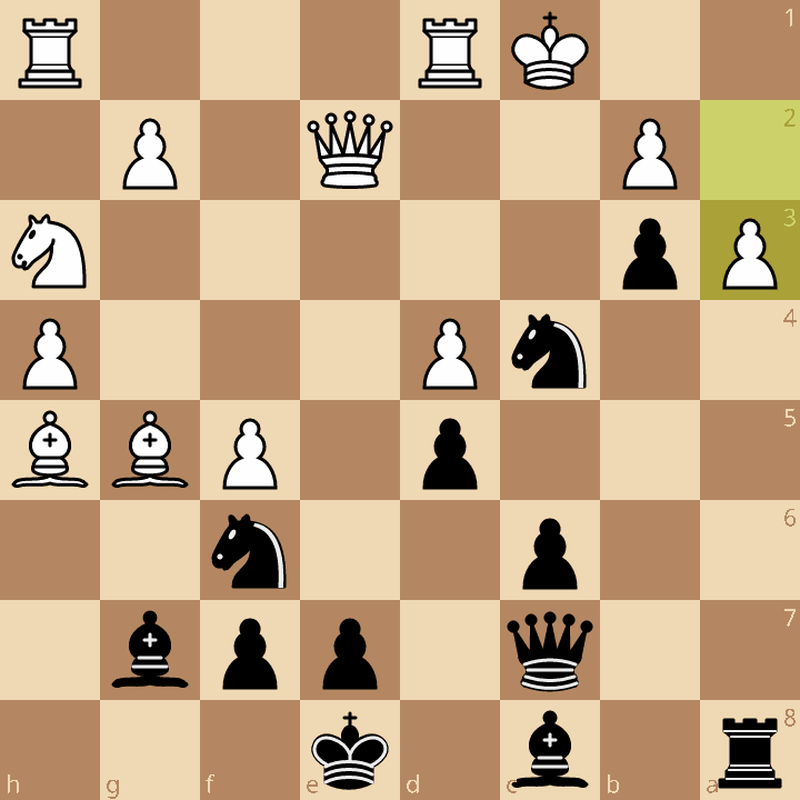
20...Rxa3!!
Stunning! White must have never expected this – Black does not even have a forced follow-up! What tactical skill must one have to go like this against a top GM?
21. bxa3 Qa5
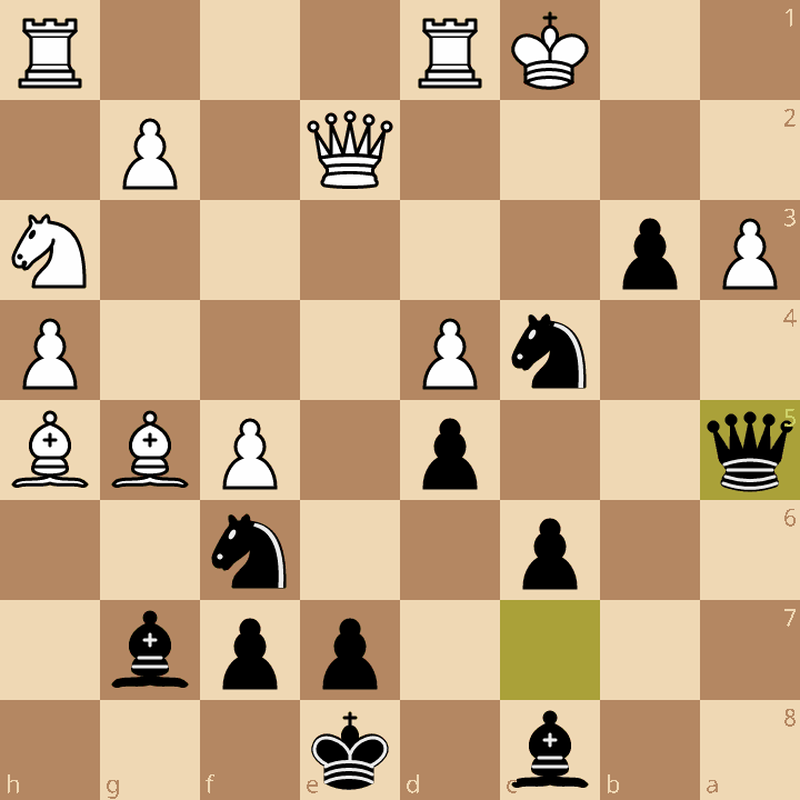
Black only has a knight for two rook, but man, it's a good knight. You might think that Black doesn't have too much firepower on the queenside. Wait a minute – it's all coming soon.
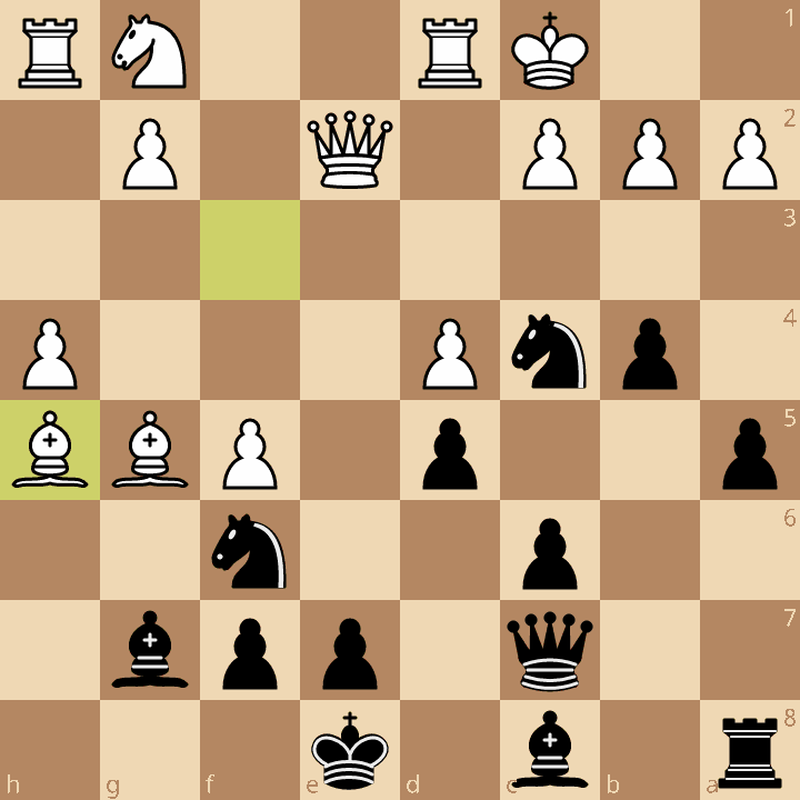
22. Rd3 Qxa3+ 23. Kb1 Bxf5
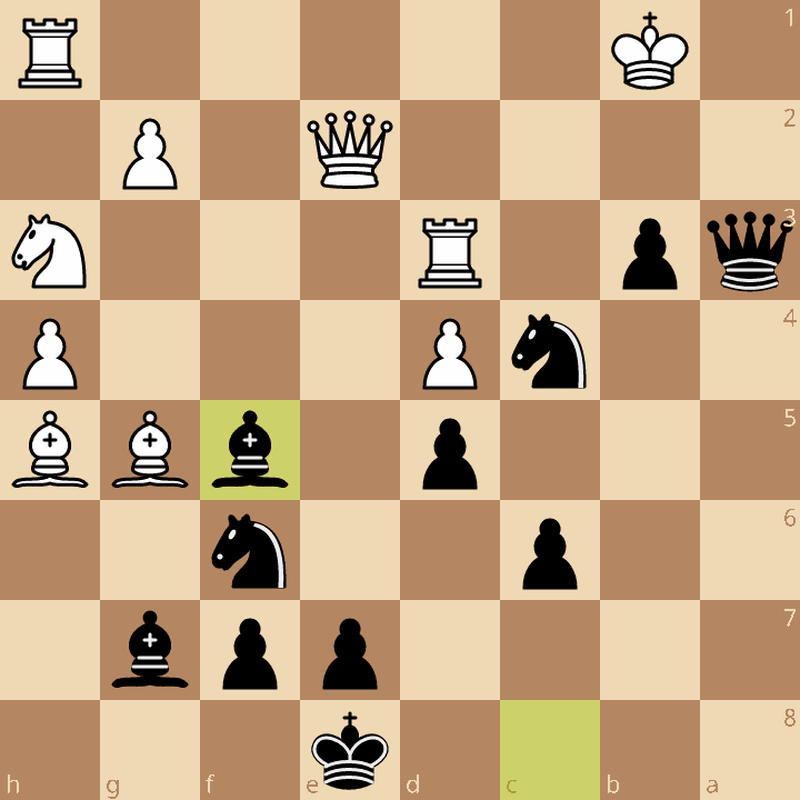
Love these positions where it's not the material that counts. Black's pieces are all suddenly coming to life – and you can now see the potential in these two bishops and two knights.
24. Nf2 b2 25. Bxf7+ Kxf7 26. Bxf6
White is desperately trying to open up Black's king to give some checks and get tactical chances. However, Black doesn't need to bother – this bishop will remain hanging to the end of the game.
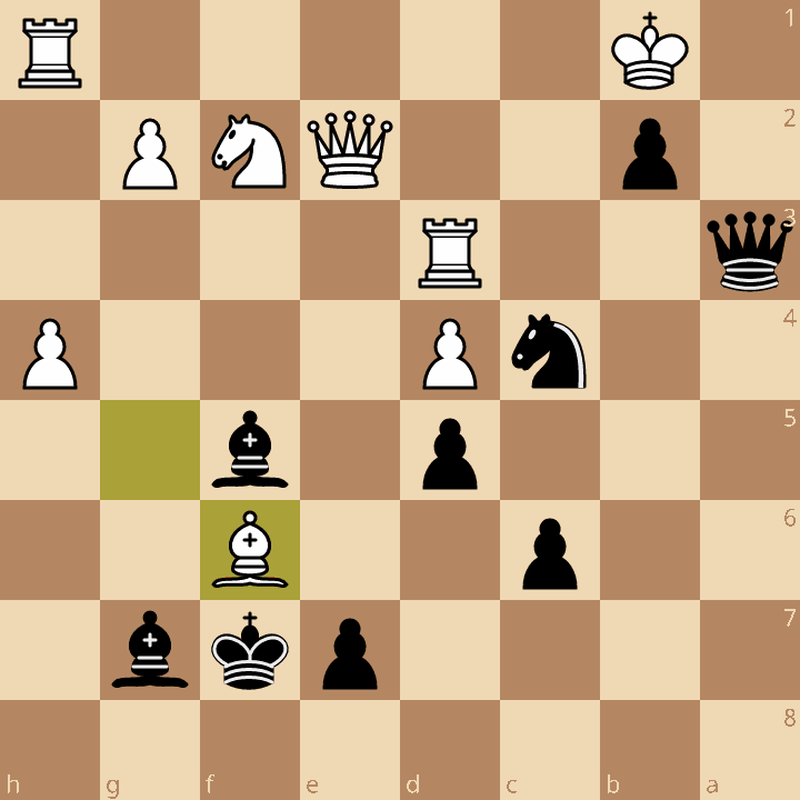
26...Qa1+ 27. Kc2 b1=Q+ 0-1
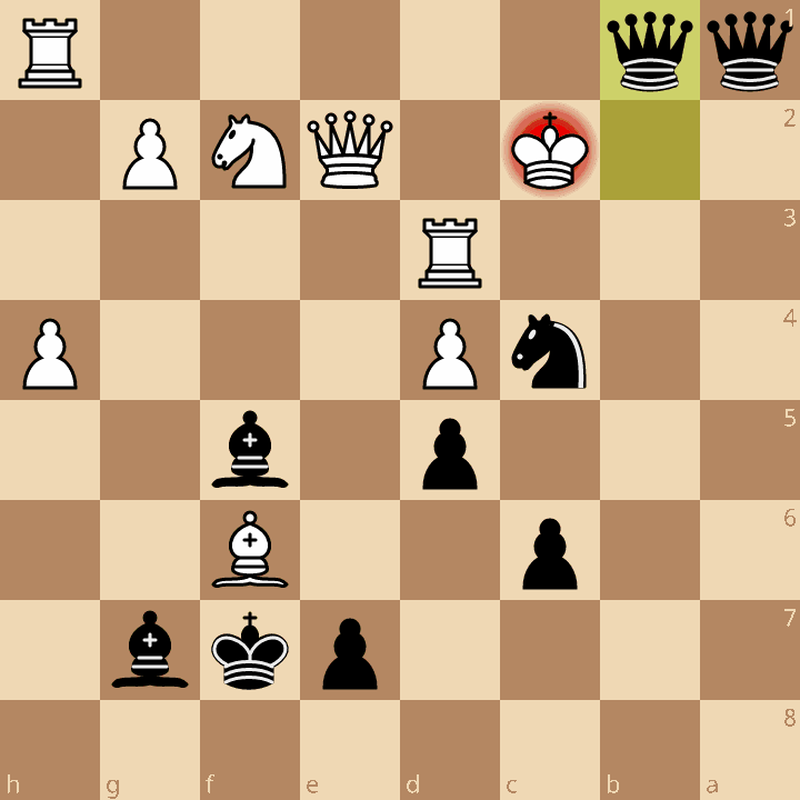
In this picturesque position, White resigned. Amazing! Who else could sacrifice a rook on the h-file, the other on the a-file, and then play a quiet move – all to promote to a second queen to make the opponent resign?
Almost made me take up the Pirc, if it weren't for its complexity. What would you say to this?
Please don't forget to hit Like and Follow. It's more fun together, isn't it?
You may also like
 paunchypawn
The brilliancy that will make you want to play the Smith–Morra
Would have hooked me up too, but I'd been playing it already ChessMonitor_Stats
Where do Grandmasters play Chess? - Lichess vs. Chess.com
This is the first large-scale analysis of Grandmaster activity across Chess.com and Lichess from 200… paunchypawn
A tactical jewel of a game in the French
You've never seen so many pins at once paunchypawn
Luckier against 2233 – or tougher?
For some reason, it's crushing the Pirc again FM MathiCasa
Chess Football: A Fun and Creative Variant
Where chess pieces become "players" and the traditional chessboard turns into a soccer field CM HGabor